Building a Tool To Add Dynamic Content to My GitHub Profile
How I built dōteki, a plugin-based tool to add dynamic content to GitHub profiles. Inspiration, thought process, and future plans.
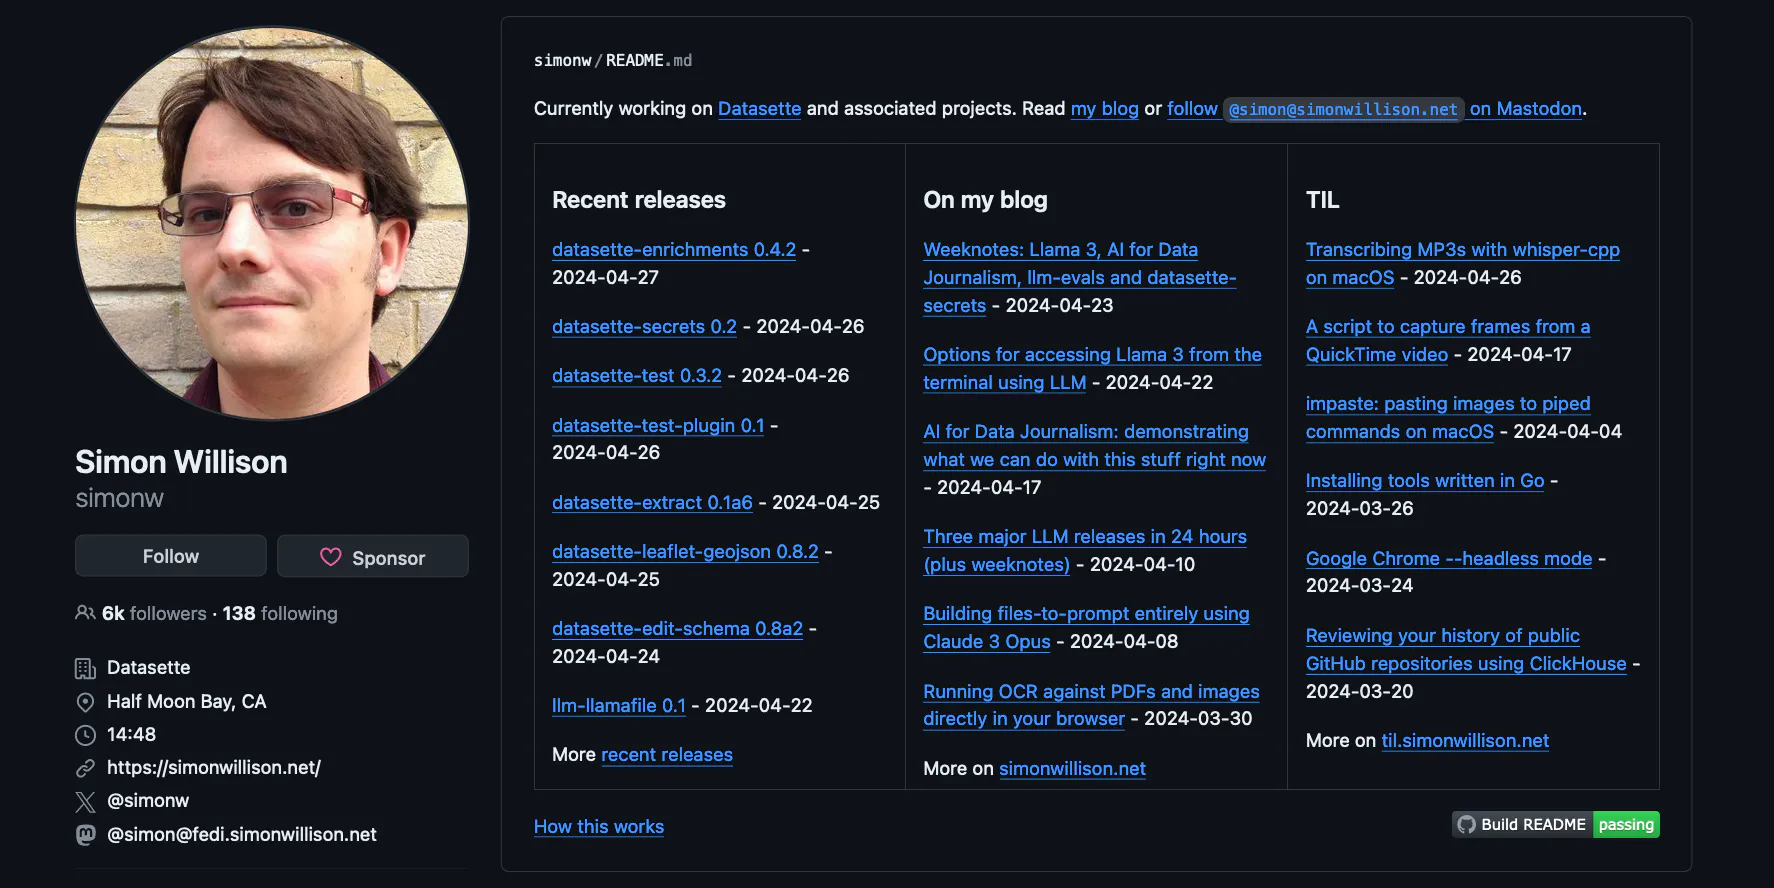
Simon Willison’s GitHub profile inspired me to build a tool to add dynamic content to my profile. His profile looks like this:

To add content to your GitHub profile, create a repository with a name that matches your username (e.g. github.com/welpo/welpo) and add a README.md file to it. Its contents will be shown on your profile.
Willison’s profile offers an overview of what he’s been writing, both in terms of prose and code. Looking at the raw contents of his README.md file I noticed these start/end markers:
### Recent releases
<!-- recent_releases starts -->
[recent releases here]
<!-- recent_releases ends -->
They are HTML comments—invisible but useful. Willison is using a Python script to add his recent software releases and posts between the markers. The updates are automated through GitHub Actions.
Pretty clever, no? After seeing this, I felt like showcasing my latest blog posts and the music I’ve been listening to on my profile.
A weekend project?
I created a Python file with two functions, one to fetch my blog feed and return a list of posts, and another to call the Last.fm API to get my most-listened artists of the week. Both functions needed to:
- find the HTML markers in my
README.md; - trim the results (posts or artists) to the first
nelements; - format with MarkDown;
- replace the content within the markers.
My solution: create a general program to handle the overlapping requirements, and smaller, standalone modules to handle tasks like fetching the posts or my most-listened artists. I would call these modules “plugins”.
Although more than one tool exists to display recent posts, I found none for a clean showcase of music habits. Furthermore, tools that add dynamic content to a GitHub profile use various configurations methods: YAML files that generate the README from scratch, HTML markers like we’ve seen, or embedding content from Vercel web apps. Establishing a Plugin Standard and using a single, clear TOML configuration file was the optimal approach.
The general program would work with two files: the profile README.md, and a TOML configuration file. On the README.md I would add the HTML comments to mark where the dynamic content needs to go. For example:
The configuration file would define what to do on each pair of markers (a section). That is: what’s the identifier of the section? What plugin do we need to run? With what settings? For example:
[]
= "lastfm"
= "welpo"
This will find the pair of markers identified with “music” and run the lastfm plugin with my username. The output of the plugin will be placed between the markers: <!-- music start -->[Right here]<!-- music end -->.
The main program, dōteki (“dynamic” in Japanese), handles the following tasks:
- Process the TOML configuration file and command line arguments.
- Read the contents of the
README.mdfile. - Find the markers for each section found on the configuration file.
- For each section:
- Call the
runfunction of the specified plugin, passing the settings along. - Format the output of the plugin. For example, by turning it into a comma separated string, or into a MarkDown list (like this one).
- Replace the contents between the markers with the formatted output of the plugin.
- Call the
- Save the
README.mdfile.
The plugins are standalone Python files that return something: a list of posts, recently listened tracks, the current date…
A few extras
To automate the updates, I created my first GitHub Action: doteki-action. Its 50 lines set up Python and dependencies, run dōteki with the configuration file in the user’s repository, and save the changes.
Though dōteki is not my first public Python project, it’s the first I deemed worthy of a proper release. This meant learning how to publish on PyPI, the official software repository for Python. It took trial and error and a few yanked releases, but now the publishing process is automated: when I push a Git tag with a version number to GitHub, a GitHub Action publishes to PyPI, creates a GitHub release, and updates the dōteki action to use the latest version. All with a cool changelog.
I learnt to use two more tools: Mend Renovate to automate dependency updates through pull requests (see an example), and Docusaurus to build a neat looking documentation website.
Sharing is learning
Writing the project’s documentation helped clarify my goals, made me think how to present it—what to highlight—and how to ensure a smooth start for new users. Explaining the code to friends brought to light inefficiencies and redundancies I had overlooked.
One of these friends had recommended the book Clean Code, by Robert C. Martin (great read!). Writing dōteki gave me the opportunity to apply the principles of the book. My hope is that the main code (cli.py) can be understood by reading it from top to bottom.
The future of the project
The first dōteki release included four plugins:
- Current Date Plugin;
- Feed Plugin to fetch and format entries from an RSS/Atom feed;
- Last.fm Plugin to display top artists, albums, tracks, or tags;
- Random Choice Plugin, which returns a random element from a list.
I would love to see the project grow, both in terms of users and contributors. As for my personal goals, I plan to write these two plugins:
- Recent Releases Plugin: return a list of recent releases of GitHub projects;
- Currently Reading Plugin compatible with Goodreads and/or Literal.
It’s not the first time a “weekend project” turns into a multi-week project; the requirements grew along with the lines of code. It has been a fun learning experience, though, and I’m proud of the tool, its documentation and CI/CD infrastructure.
If you want to learn more about dōteki, check out these links:
- Website / Documentation
- GitHub repository
- My GitHub profile to see it in action.
The project is open to all contributions: feature requests, bug fixes, documentation improvements, new plugins… If you have an idea for a plugin or want to share your thoughts, feel free to use the comments below, shoot me an email, or use the project’s issue tracker/discussions.